Next.js App Router Quickstart
This quickstart will guide you through the process of setting up Ory Elements with the App Router in a Next.js application.
The code used in the following quickstart is available in the App Router example GitHub repository
Prerequisites
This quickstart assumes you're using the alias configuration and not using a src/ directory. If your project uses src/, place
all files referenced as being in the root directory inside src/ instead.
-
Create a new Next.js application using your preferred package manager. You can use the following commands to create a new Next.js app:
- NPM
- PNPM
- Yarn
- Bun
npm create next-app@latestpnpm create next-appyarn create next-appbun create next-app -
Install the
@ory/elements-reactand@ory/nextjspackage in your Next.js application.- NPM
- PNPM
- Yarn
- Bun
npm install @ory/elements-react @ory/nextjspnpm install @ory/elements-react @ory/nextjsyarn install @ory/elements-react @ory/nextjsbun install @ory/elements-react @ory/nextjs -
Add the configuration for Ory Elements in your Next.js application. Create a new file named
ory.config.tsin the root of your project and add the following code:ory.config.ts -
Add the middleware to your Next.js application. Create a new file named
middleware.tsin the root of your project and add the following code:middleware.ts -
Configure browser redirects in your Ory Console. Navigate to Branding > Browser redirects and set the Global redirect URL to
/ui/welcome. This ensures users are redirected to the correct page after completing authentication flows.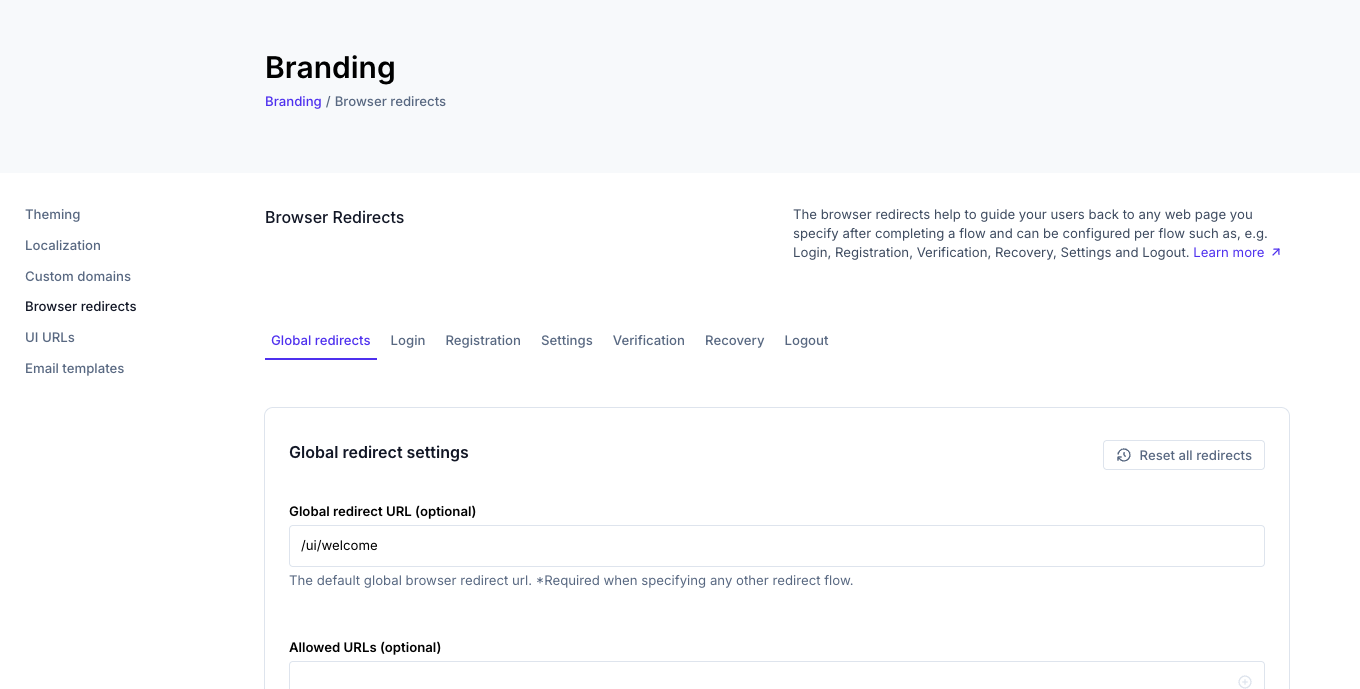
-
Create a new folder named
componentsin the root of your project. Inside thecomponentsfolder, create a new file namedcustom-card-header.tsxand add the following code:components/custom-card-header.tsxThis component is used by the Verification and Settings pages to customize the card header.
-
Create a new folder named
appin the root of your project. Inside theappfolder, create a new folder namedauth. Inside theauthfolder, create the following files:login/page.tsxregistration/page.tsxrecovery/page.tsxverification/page.tsx
Additionally, create a
settingsfolder in theappdirectory:settings/page.tsx
Each of these files will contain the respective Ory Elements component for the self-service flow.
- Login
- Registration
- Recovery
- Verification
- Settings
app/auth/login/page.tsxapp/auth/registration/page.tsxapp/auth/recovery/page.tsxapp/auth/verification/page.tsxapp/settings/page.tsx -
Use your own Ory Network project by setting the
ORY_SDK_URLenvironment variable in your.envfile:You can find your Ory Network project URL in the Get started section of the Ory Console.
-
Run the application and create your first user by navigating to
/auth/registration. After registration, you can log in at/auth/login. You can also access the other self-service flows at the following URLs:- Recovery:
/auth/recovery - Verification:
/auth/verification - Settings:
/settings
- NPM
- PNPM
- Yarn
- Bun
npm run devpnpm devyarn devbun devOpen your browser and navigate to
http://localhost:3000/auth/registrationto create your first user. - Recovery:
Next steps
Now that you have set up Ory Elements with the App Router in your Next.js application, you can further customize the components, add your own styles, and integrate them into your application as needed. You can also explore the Ory Elements documentation for more information on how to use the components and customize them to fit your needs. See Theming for more details on how to customize look and feel of the components.